
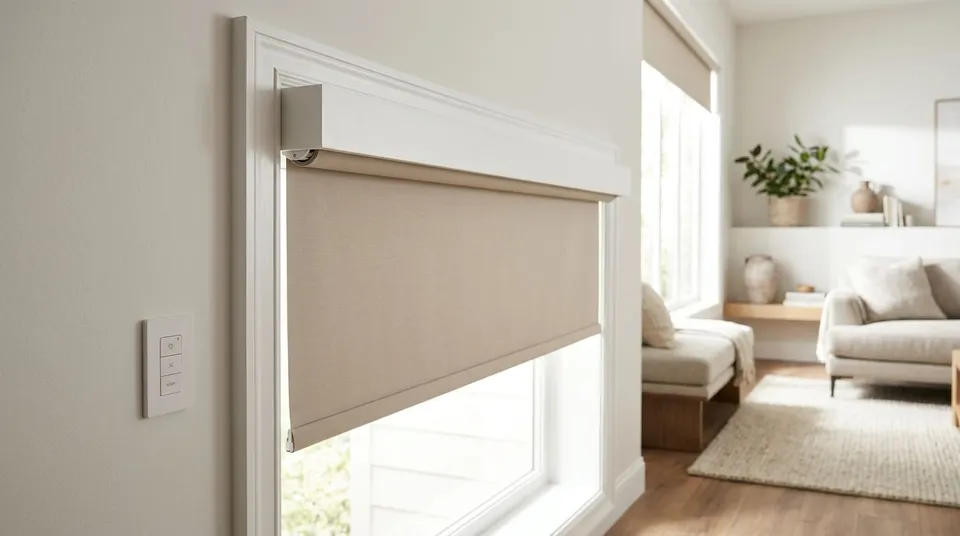
New-construction and remodeling homeowners get concealed wiring for motorized shades right by planning the power route before drywall closes the wall, not after. Concealed wiring for motorized shades means running low-voltage or hardwired power lines inside wall cavities, headrails, or window casings so no cord, plug, or dangling wire is visible once the shade is mounted. A homeowner remodeling a kitchen or framing a new great room controls the wall while it is still open, a chance that disappears the moment paint goes on.
- Concealed wiring for motorized shades works best when routed before drywall closes on new construction and remodels in 2026.
- Rainier Blinds measures and installs motorized roller, cellular, and zebra shades, but a licensed electrician runs the hardwired power.
- Battery-powered motorized shades skip wiring entirely and suit retrofit rooms with no nearby outlet.
- Hardwired systems need an open wall and a dedicated electrician run, so plan wiring before final inspection.
Why concealed wiring matters for new-construction and remodeling homeowners
A wall only gets opened once during framing or a gut remodel. Skip the wiring conversation at that stage and every later fix means cutting into finished drywall, patching, and repainting, on top of the electrical work itself.
Homeowners planning motorized shades for large picture windows or a full room of automated coverings run into this constantly: the shade order comes together fast, but the wiring plan gets an afterthought. In 2026, most motorized shade motors still need either a hardwired circuit, a low-voltage transformer, or a rechargeable battery, and each path has a different construction footprint. Decide which one fits the project before the electrician's rough-in inspection, not after.
Update your rough-in plan before framing closes
Walk every window slated for motorization with the builder or electrician while studs are still exposed.
- Confirm which windows get motorized versus manual operation
- Mark headrail depth and mount type so the wire chase lands in the right spot
- Request a low-voltage junction box or blank plate at each motorized window
- Note window casing width if wire needs to route through trim rather than wall cavity
- Flag any window near a smart hub location so cable runs stay short
Choose a power path: hardwired, low-voltage, or battery
The manual approach is to pick the power type window by window based on access, not by defaulting to whatever the electrician quoted first.
- Hardwired: a dedicated 120V or transformer-fed line run to the headrail, best for whole-home automation planned during construction
- Low-voltage: a small transformer feeds multiple shades on one circuit, common in remodels with an open wall nearby
- Rechargeable battery: no wiring at all, motor runs on an internal battery pack recharged periodically
- Solar-charged battery: a small panel tops off the battery pack, useful for windows with strong daylight exposure
Rainier Blinds measures each window during a free in-home visit and quotes motorized shade options against the wiring path a homeowner already has or is planning, which saves a second electrician trip to re-scope the job. Reading how to program motorized window shades before the visit helps homeowners ask sharper questions about hub compatibility and remote range.
Route wire inside the wall before drywall goes up
This step only applies while the wall is open, which is exactly why new construction and remodel projects have the advantage over a straight replacement job.
- Run low-voltage conduit from the junction box up to the window header
- Leave a pull string in the conduit in case a different motor brand needs a thicker cable later
- Label each wire run at both ends before the electrician leaves the job site
- Schedule the rough-in inspection before insulation goes in, not after
- Confirm the transformer location is accessible for future service, not buried behind a finished wall
Hide wiring in an existing wall without demolition
Retrofit projects do not get an open wall, so the tactics shift toward surface-mounted and battery-based solutions.
- Run a paint-matched raceway along the window casing instead of cutting into drywall
- Route wire behind existing baseboard using a low-profile channel
- Use a battery-powered motorized shade to skip wiring entirely on a single problem window
- Position the transformer inside a nearby closet or cabinet rather than in the open room
- Check how to maintain motorized window shade batteries before committing to battery power on a hard-to-reach window
Pick a headrail and mount that hides the wire drop
The wiring plan and the shade hardware have to agree with each other, or the wire ends up visible anyway.
- A cassette-style roller shade headrail covers the wire connection point completely
- Recessed pocket mounts hide both the shade roll and the wire drop inside the window frame
- Side-channel systems route wire down the channel instead of down open casing
- Fascia-covered headrails work for cellular and zebra shades where a plain roller tube would expose the wire
Test power and range before the wall closes for good
Skipping this step is the single most expensive mistake on a new-construction job, because a failed test after drywall means reopening a finished wall.
- Confirm remote and hub range from the far side of the room, not just standing at the window
- Run a full battery charge cycle before the wall closes, if battery power was chosen
- Verify the transformer output matches the motor's voltage requirement
- Check strain relief on the wire connection so vibration from the motor doesn't loosen it over time
Pair the wiring plan with a smart-home hub
A concealed wiring job that ends at a standalone remote is only half-finished for most homeowners in 2026.
- Confirm hub compatibility with the specific motor brand before wiring is finalized
- Group multiple windows on one scene or schedule through the hub
- Test voice control integration before final trim goes on, in case a signal booster is needed
- Review how to pair motorized shades with a smart home hub to confirm which protocols the household's existing hub supports
Plan wiring before the wall closes
A free in-home visit maps wiring needs for every window.
Comparing concealed wiring options
| Option | Best for | Wiring required | Key limitation |
|---|---|---|---|
| Hardwired | New construction, whole-home automation | Dedicated electrical run to each window | Needs an open wall and a licensed electrician |
| Low-voltage | Remodels with one nearby open wall | Transformer feeding multiple shades on one circuit | Transformer needs an accessible service location |
| Rechargeable battery | Retrofit rooms, single problem windows | None, motor runs on internal battery | Requires periodic recharging or battery swaps |
| Solar-charged battery | South- and west-facing windows | None, panel tops off the battery pack | Output drops on shaded or north-facing windows |
Common mistakes new-construction and remodel homeowners make
- Skipping the electrician walkthrough until after drywall. By then the only options left are surface raceways or battery power, both compromises compared to a planned in-wall run.
- Choosing hardwired for a retrofit with finished walls. Cutting into painted drywall to add a circuit costs more time and mess than a rechargeable battery motor would have.
- Forgetting a charging plan for battery shades far from an outlet. A battery pack with no easy recharge point turns into a maintenance headache within a season.
- Not measuring headrail depth before ordering. A cassette headrail that's too shallow leaves the wire connection point exposed at the top of the window.
- Assuming any smart hub works with any motor brand. Protocol mismatches are common enough in 2026 that compatibility should be confirmed before the wire run, not after.
FAQ
What is concealed wiring for motorized shades?
Concealed wiring for motorized shades routes power and control cable inside wall cavities, headrails, or window casings so no cord or wire is visible once the shade is installed. It's planned during framing on new construction or worked around existing walls on a retrofit.
Do motorized shades need an electrician?
Hardwired motorized shades need a licensed electrician to run a dedicated circuit to each window. Low-voltage and battery-powered motorized shades typically don't require an electrician.
Can motorized shades run without any wiring at all?
Yes, rechargeable battery motors and solar-charged battery motors skip wiring entirely and run on an internal battery pack. This is the most common path for retrofit rooms with finished walls.
Is it possible to hide wiring in an existing wall without construction?
A paint-matched raceway along the window casing or a channel behind the baseboard hides wire on an existing wall without cutting into drywall. Battery power avoids the wiring question completely on a single problem window.
What's the difference between motorized and smart shades?
Motorized shades operate on a remote or wall switch, while smart shades pair with a hub for scheduling, scenes, and voice control. Both can use the same wiring or battery setup, the difference is in the control layer, not the power source.
Can motorized shades work with Alexa or Google Home?
Motorized shades work with Alexa or Google Home when the motor's hub or bridge supports that integration. Confirm compatibility before finalizing the wiring plan, since not every motor brand supports every hub.
Should new-construction homes plan shade wiring before drywall goes up?
Yes, planning shade wiring during framing lets an electrician run power directly to each window without cutting into a finished wall later. This is the cheapest and cleanest point in the build to make that decision.
One last thing
The wall only opens once. A homeowner who plans concealed wiring for motorized shades during framing spends less than one who retrofits it into a painted wall two years later, and the shade selection itself, roller, cellular, zebra, or drapery, matters less to that cost than the timing of the wiring decision.