
Our available controls: Rainier Blinds offers Roman and woven wood shades with motorized operation only. Available controls and power options for other products are confirmed at your consultation.
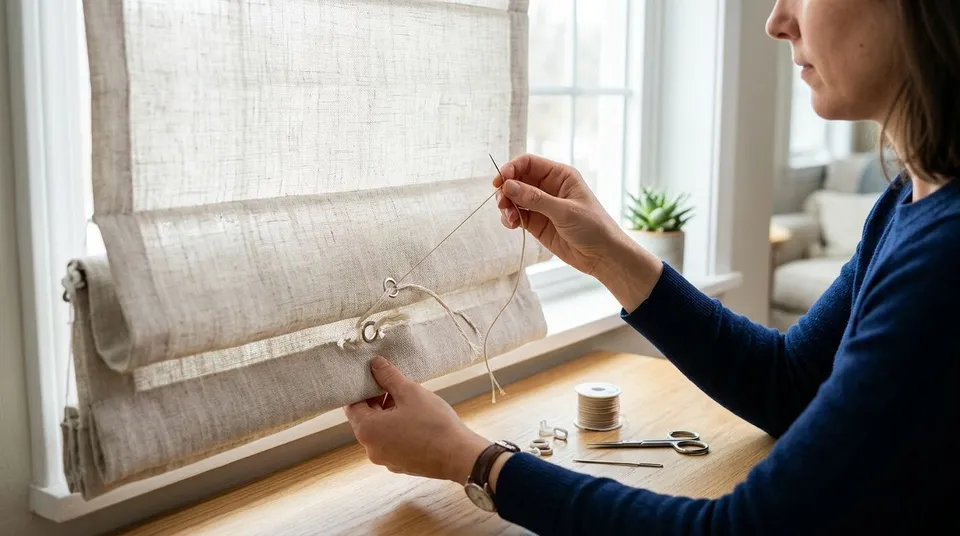
Replace broken roman shade lift cords by removing the shade, documenting the original cord path, threading matching replacement cord through every rear ring and headrail guide, then balancing the tension before remounting it. Stop if the fabric rings, cord lock, clutch, or headrail are damaged, because new cord alone will not correct those failures in 2026.
- To learn how to replace roman shade lift cords, copy the original routing and use cord matched to the existing mechanism.
- Test the cord lock or clutch before restringing because a failed mechanism can look like a broken lift cord.
- Replace every damaged lift line, balance the tension, and test the roman shade while it remains off the window.
- Rainier Blinds is best for Greater Seattle homeowners replacing an old shade with a custom manual, motorized, or smart roman shade.
How do you replace roman shade lift cords?
Follow the existing cord path exactly. If the shade has additional damage, use this broader broken window covering repair guide to separate a cord failure from a headrail, mounting, or fabric problem.
- Lower the roman shade completely. Support the bottom rail so the fabric does not drop when you release the damaged lift line.
- Photograph the back of the shade. Capture every vertical ring column, top guide, knot, cord lock, and cord exit before removing anything.
- Remove the shade from its brackets. Follow the hardware design already installed and support the full width of the headrail while releasing it.
- Lay the shade face down on a clean surface. Straighten the fabric without pulling on intact lift cords or forcing the folds flat.
- Identify the lift mechanism. Traditional cord lock systems, continuous loop clutch systems, cordless mechanisms, and motorized units do not use the same repair process.
- Test the lock or clutch. If intact cord moves but the mechanism will not grip, release, or turn, restringing is not the complete fix.
- Remove the failed cord carefully. Preserve it as a routing and length reference. Do not pull out every cord before documenting where each one runs.
- Thread matching replacement cord. Start at the bottom attachment point, continue through every ring in that vertical column, then follow the original path through the headrail guides.
- Reconnect the operating end. Reproduce the original knots and connections without altering the mechanism or creating an exposed loop that was not present before.
- Balance all lift lines. Apply equal tension while the shade lies flat so the bottom rail remains level when the cords begin lifting.
- Test the full travel off the window. Raise, stop, lower, and stop the shade several times while supporting the headrail.
- Remount and test again. Confirm that the fabric stacks evenly, the bottom rail stays level, and no cord rubs against a bracket or sharp edge.
The correct 2026 repair preserves the original cord route and operating design rather than improvising a new exposed cord system. If you cannot reproduce the routing confidently, move to replacement instead of trial and error.
Why this matters
A roman shade depends on several lift lines working together. One line routed through the wrong ring can pull a fold sideways, tilt the bottom rail, or concentrate force on a fabric attachment point.
Cord safety also matters. The United States Consumer Product Safety Commission states that window coverings sold in the United States must be cordless, use inaccessible operating cords, or use short operating cords measuring no more than 8 inches under the applicable safety requirements that took effect on June 1, 2024. Repairing an older shade in 2026 does not automatically bring its original design into line with current product standards.
Do not create a longer loop, bypass a safety device, or add a cord arrangement that differs from the original design. Rainier Blinds recommends replacement when an old operating system cannot be restored without leaving an accessible cord hazard.
Identify the failure before replacing cord
The visible symptom tells you where to inspect first. Do not assume every shade that hangs unevenly needs complete restringing.
| Symptom | Likely issue | Best for | Main advantage | Main drawback | Verdict |
|---|---|---|---|---|---|
| One side hangs lower | Broken, detached, or misrouted lift line | A shade with intact fabric and hardware | Targets the failed cord path | Requires careful tension balancing | Repair |
| Cord moves but will not hold | Worn or jammed cord lock | Mechanism diagnosis | Separates lock failure from cord failure | New cord will not fix a failed lock | Hold |
| Loop moves but shade does not | Clutch, connector, or internal lift problem | Continuous loop systems | Identifies a mechanical failure | Headrail service may be required | Hold |
| Rear ring has torn away | Fabric or ring attachment failure | Structurally sound fabric that can be repaired correctly | Preserves the existing shade | Restringing alone is incomplete | Wait |
| Multiple parts are worn | Aging shade with repeated failures | Homeowners comparing replacement | Avoids repeated repairs | Requires a new measured installation | Replace |
| Cordless or motorized unit stops lifting | Internal mechanism or motor problem | Manufacturer specified service | Keeps the designed safety system intact | Not a standard cord replacement job | Skip DIY |
A traditional roman shade often has separate lift cords running through columns of rings behind the fabric. A continuous loop model uses an operating loop to turn a clutch, while internal lift lines raise the shade. Replacing the visible loop does not repair broken internal lines, and replacing internal lines does not fix a failed clutch.
Cordless and motorized roman shades require a different diagnosis. Do not open a motor housing or dismantle a spring mechanism as though it were a traditional cord lock.
What tools and materials do you need?
Gather everything before releasing the first knot:
- Replacement lift cord matched to the original cord diameter, construction, and mechanism
- Screwdriver suited to the installed brackets and headrail hardware
- Scissors made for a clean cord cut
- Needle nose pliers for accessible knots or connectors
- Painter's tape for labeling each cord column
- A phone camera for recording the original route
- A clean table or floor area wide enough to support the shade
- A small container for bracket screws and removable hardware
Do not substitute household string, fishing line, ribbon, or an elastic cord. Each behaves differently under load and through the headrail guides. An incorrect material can slip in the cord lock, cut into a guide, or stretch enough to leave the shade uneven.
If the original cord is missing, do not guess its specification from the window size. The shade manufacturer, original order record, mechanism label, or a window treatment professional is the right source for compatibility.
How do you remove the old lift cords?
Start with the shade fully lowered and supported. Mark each rear ring column from left to right, then label the corresponding cord near the headrail so you can keep every route separate.
Untie or release the damaged cord from its lowest attachment point. Feed it back through the rings one at a time rather than pulling sharply from the headrail. A sudden pull can tighten a hidden knot, distort a ring, or drag debris into the lock.
At the top, inspect every guide the cord touches. Look for rough edges, a pinched guide, visible debris, or a mounting screw intruding into the cord path. Replacing cord without correcting the contact point sets up the same failure again.
Keep the removed cord intact when possible. It provides the clearest reference for the original route and required working length, including the section inside the headrail. If several lines need replacement, remove and rebuild one column at a time so the remaining cords preserve the pattern.
How do you thread the new roman shade cord?
Anchor the replacement cord at the same bottom point used by the original. Use the same attachment method rather than adding hardware or moving the anchor to a different fold.
Pass the cord through each ring in its labeled vertical column. The cord should travel cleanly without crossing another lift line, skipping a ring, or wrapping around a fabric fold. At the headrail, continue through the guides in the same order shown in your photos.
Keep light tension on the new line while threading, but do not pull the shade into a raised position. Once the cord reaches the lock or operating mechanism, reconnect it according to the existing design.
Repeat the process only for other lines that show damage, abrasion, stiffness, or contamination. If every old line is being replaced, preserve one original line until the others are routed, then use the rebuilt columns as references for the last one.
The fabric also needs inspection before final tensioning. A guide to choosing fabric for custom roman shades explains why material weight and fold behavior affect the finished shade, but cord repair cannot correct stretched fabric or torn rear attachments.
How do you make the roman shade hang evenly?
Lay the shade flat with every fold aligned. Pull each lift line until it has light, equal tension, then compare the bottom rail with the headrail before securing the operating ends.
Test the first part of the lift while supporting the headrail. If one side rises first, stop and reduce tension on that line or increase slack until all columns begin moving together. Do not compensate by forcing the lower side upward by hand while pulling the operating cord.
Raise the shade gradually and watch each ring column. A cord that jumps outside a ring, crosses another line, or rubs against a guide needs to be rerouted before mounting.
After remounting, operate the shade through its normal travel. Stop immediately if the lock slips, the clutch resists, the bottom rail tilts, or the fabric catches on a bracket.
Why roman shade cord repairs vary
The same symptom can require a different repair because roman shade construction is not standardized across every manufacturer or operating tier.
- Lift type: Traditional cord lock, continuous loop, cordless, motorized, and smart systems use different internal parts.
- Cord location: The visible operating cord can be separate from the internal lines that lift the fabric.
- Fabric condition: Torn rings, stretched lining, and damaged attachment points prevent a clean cord only repair.
- Headrail condition: Bent guides, worn locks, failed clutches, and damaged connectors require more than restringing.
- Shade shape: Standard rectangular roman shades are easier to route than specialty window treatments with unusual lift paths.
- Safety design: A repair should preserve inaccessible cords and existing safety hardware rather than recreate an outdated arrangement.
These factors determine whether the right 2026 decision is repair, mechanism service, or complete replacement.
Should you repair or replace the roman shade?
Repair makes sense when the fabric, rings, headrail, lock, and brackets remain sound and the cord path is documented. The main benefit is keeping a shade that still fits and operates correctly after restringing. The drawback is that old mechanisms and other lift lines may still show wear.
Replacement makes sense when several components have failed, rear rings are tearing out, the mechanism no longer holds, or the operating design leaves an accessible cord concern. The benefit is choosing manual, motorized, or smart operation around current needs. The drawback is that a new custom shade must be measured for the opening and installed correctly.
Rainier Blinds is best for Greater Seattle homeowners who want a custom roman shade measured and installed by the company's own crew instead of another cord repair. The shades are custom made by a wholesale supplier, while Rainier Blinds handles the in-home consultation, measuring, and installation.
Plan your roman shade replacement
Get an in-home consultation with measuring and clear pricing on the spot.
Can you replace only one broken lift cord?
Yes, you can replace one broken lift cord when the other lines remain clean, flexible, and undamaged. Inspect every line at the rings and headrail because matching tension between a new cord and badly worn cord can be difficult.
Is a broken cord lock the same as a broken lift cord?
No, a broken cord lock is not the same as a broken lift cord. A failed lock cannot hold the shade at the selected height, while a failed lift cord usually leaves one section unsupported or visibly disconnected.
Can you convert an old corded roman shade to cordless?
A conversion is only appropriate when the shade manufacturer offers a compatible system for that exact headrail and fabric assembly. Do not improvise a spring, clutch, or motor conversion; compare a purpose built replacement instead.
FAQ
What cord should I use to restring a roman shade?
Use replacement cord matched to the original diameter, construction, and lift mechanism. Household string, fishing line, ribbon, and elastic cord are not suitable substitutes.
How do I know whether the lift cord or cord lock is broken?
A broken lift cord leaves a section unsupported or shows visible separation, while a failed cord lock lets intact cord move without holding the shade at the selected height.
Can I restring a roman shade without removing it?
Removing the roman shade provides safer access to the rear rings, headrail guides, and bottom attachments. It also lets you balance the lift lines while the fabric lies flat.
Why is my roman shade crooked after restringing?
A restrung roman shade hangs crooked when the lift lines have unequal tension, a cord skipped a ring, or two lines crossed inside the headrail. Lower it, support it, and correct the affected route before further use.
Can I repair a motorized roman shade with replacement cord?
Do not treat a motorized roman shade as a traditional cord lock repair. Motorized units require diagnosis of the motor, controls, power source, headrail, and internal lift system.
Are exposed roman shade cords safe in 2026?
Current United States window covering requirements favor cordless products, inaccessible operating cords, or short operating cords no longer than 8 inches. Do not modify an older roman shade in a way that creates a new accessible loop.
When should I replace a roman shade instead of restringing it?
Replace it when the fabric attachments, headrail, lock, clutch, or several lift lines are failing. Rainier Blinds installs custom roman shades for Greater Seattle homeowners who decide replacement is the better 2026 option.
One last thing
Before mounting the shade, photograph the completed cord route next to your original photos. That final comparison catches skipped rings and crossed lines while the entire back remains visible.
If the original route created an exposed cord concern, do not copy it blindly. Stop the repair and choose a current manual, motorized, or smart roman shade that fits the opening and its users in 2026.